

Webhooks
Webhooks let you receive real-time vulnerability alerts as HTTP POST requests to your own endpoint. This enables custom integrations with SIEMs, ticketing systems, automation platforms, or any tool that can accept incoming HTTP requests.
Tier requirement: Pro or Enterprise
Navigate to your project’s Webhook Configuration page.
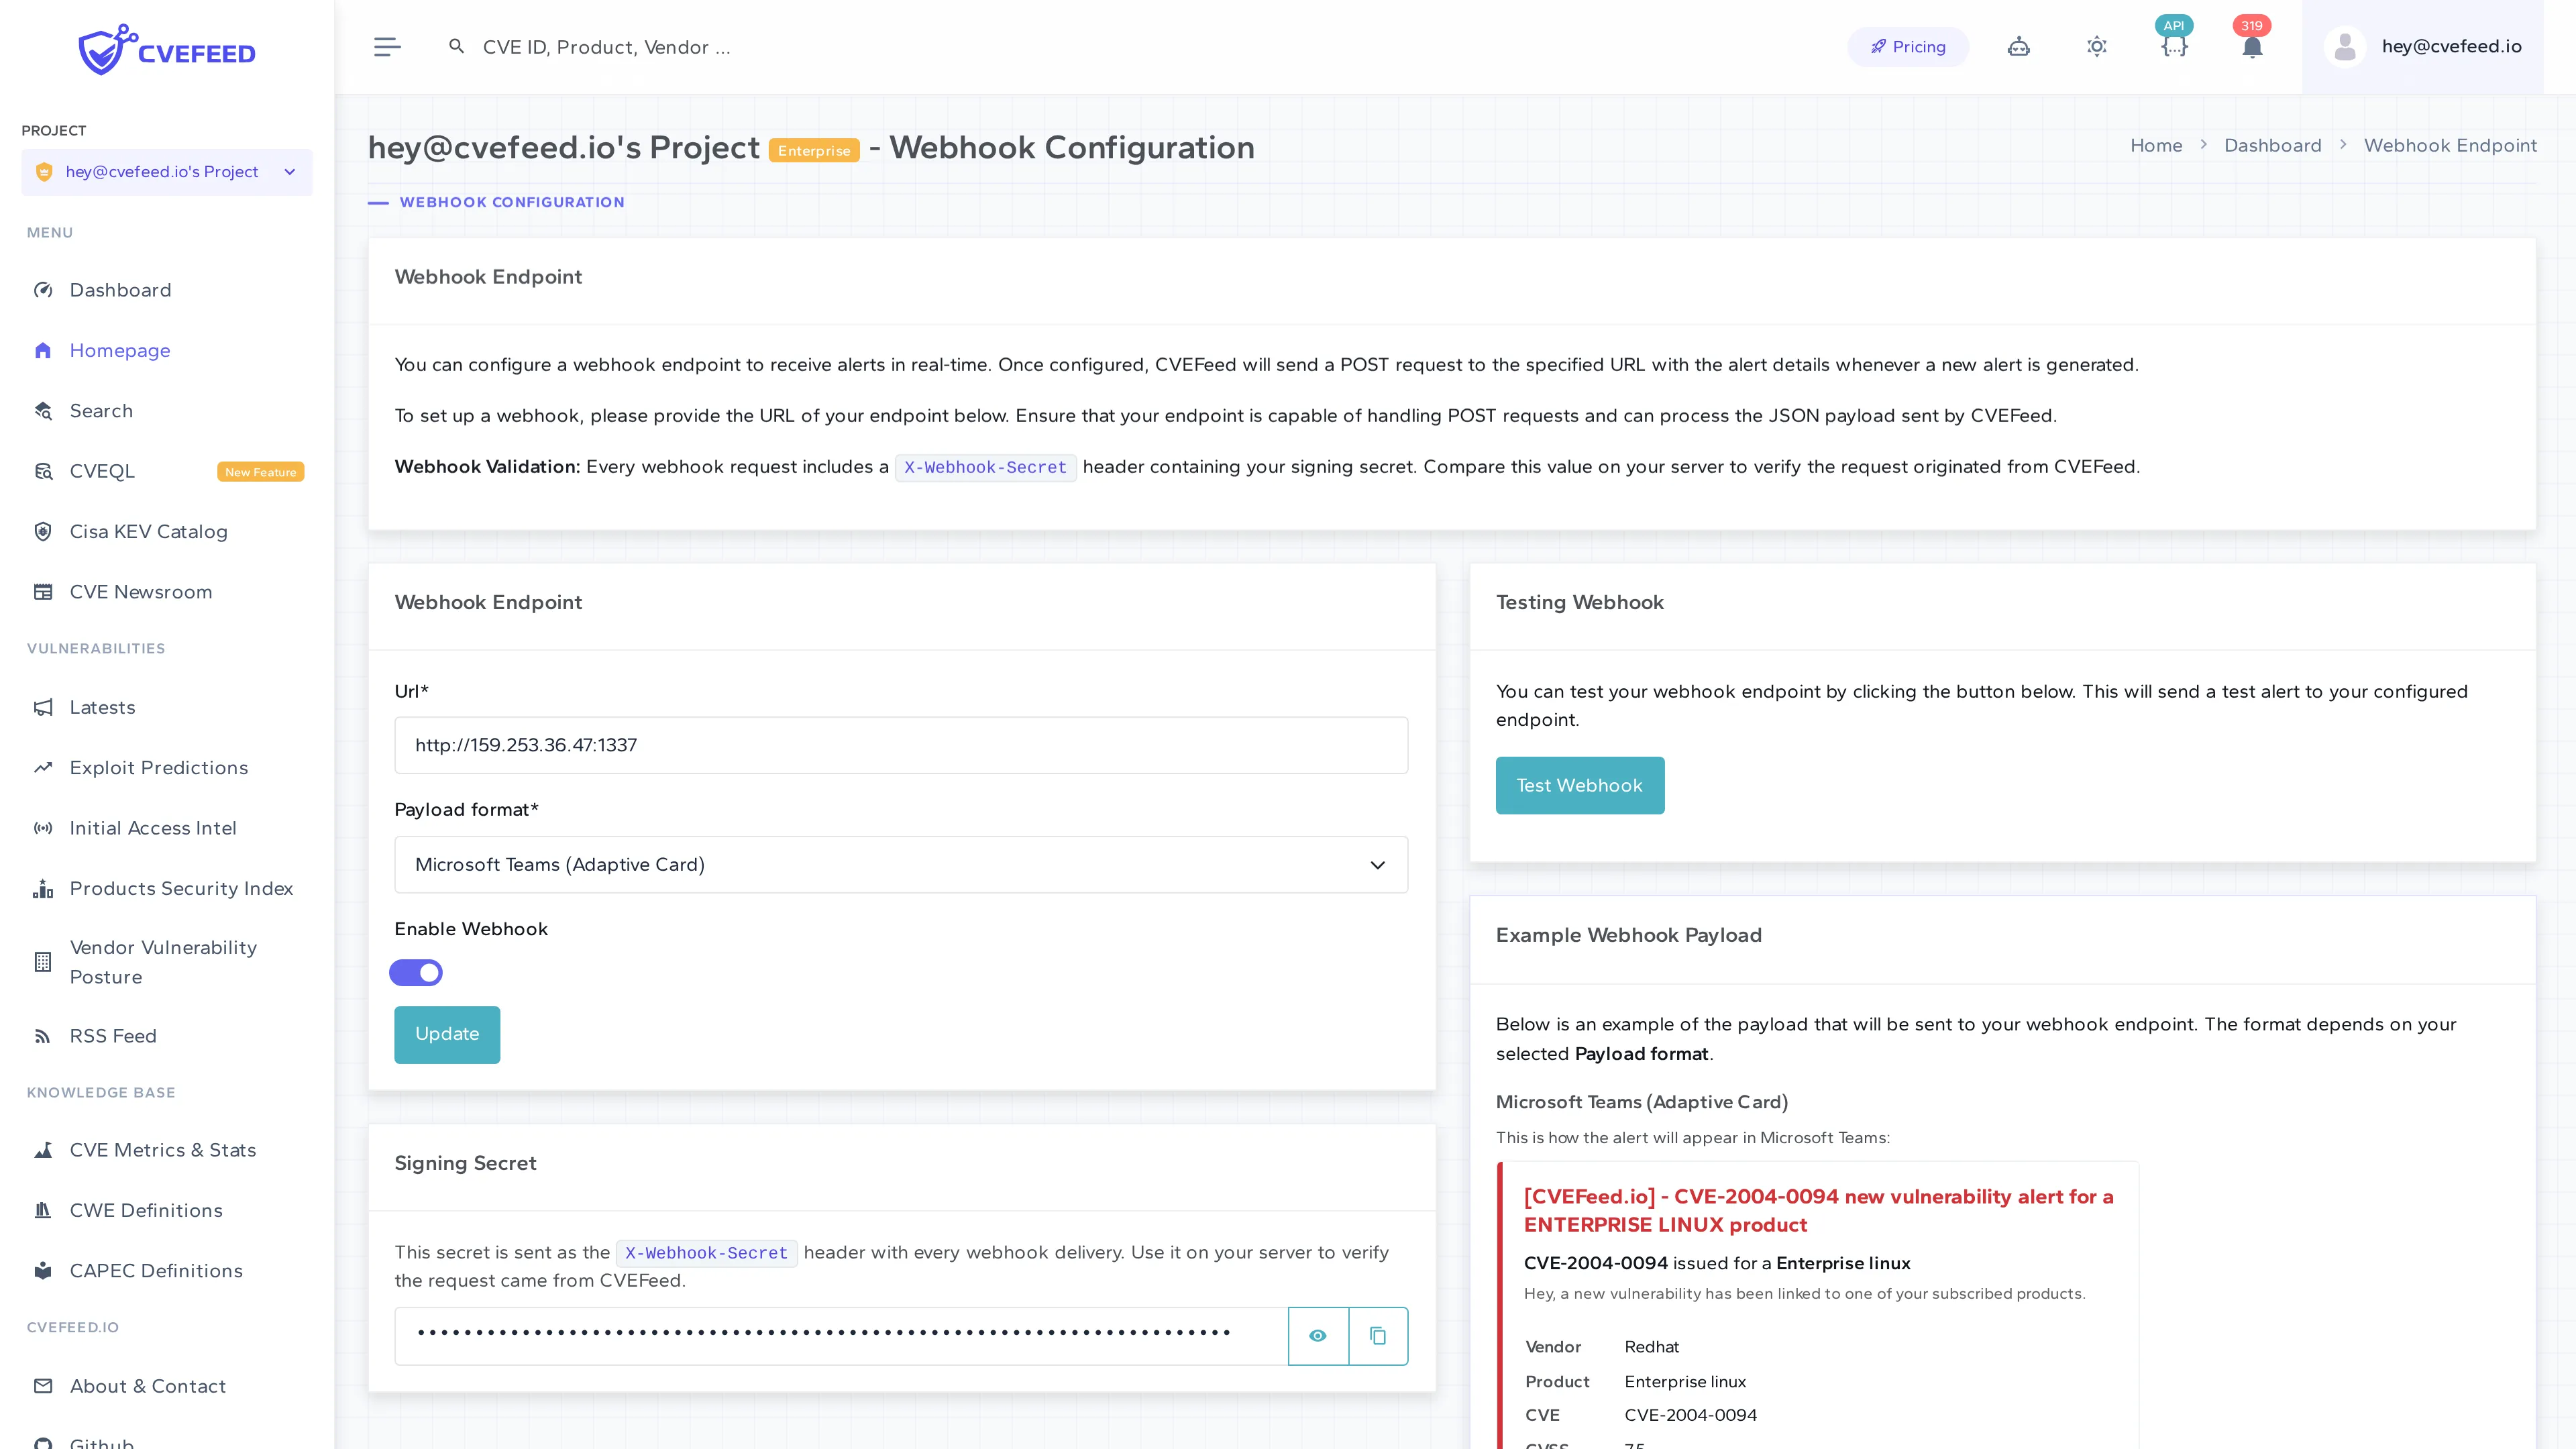
Configure the following:
- URL — the endpoint that will receive the POST requests. Both
http://andhttps://URLs are accepted. Your endpoint has 30 seconds to answer and must return a status below 300 for the delivery to count as successful; redirects are not followed. - Payload format — choose between:
- JSON — generic JSON payload with full alert data.
- Microsoft Teams (Adaptive Card) — pre-formatted for Microsoft Teams incoming webhooks (see Teams integration). Enterprise only; on lower tiers the option is disabled in the dropdown and rejected on save.
- Enable Webhook — toggle to activate or deactivate the webhook without deleting the configuration.
- Click Update to save.
Signing Secret
Section titled “Signing Secret”Every webhook endpoint is assigned a unique signing secret — a random string with a whsec_ prefix. It is sent verbatim with every request in the X-Webhook-Secret header. Compare it against your stored copy on the receiving end to confirm the request came from CVEFeed.io. It is a shared secret, not an HMAC computed over the request body, so it authenticates the sender but does not prove the payload is unmodified.
The signing secret is displayed on the configuration page — you can reveal, hide, and copy it to your clipboard.
Example JSON Payload
Section titled “Example JSON Payload”The configuration page shows an example payload. A live JSON delivery is the serialized alert, with these top-level keys:
id,project_id,project_slug— the alert and the project it belongs to.is_read— whether the alert has been marked read on CVEFeed.io.affected_products— despite the plural name, a single object describing the matched product:id,name,cve_count,get_absolute_url, and a nestedvendorobject.vulnerability— the full CVE record, the same object the vulnerability detail API returns:id,title,description,published,last_modified,cvss_score,cvss_version,severity,status,is_rejected,source_identifier,url,category,is_remote,solution,configurations,metrics,references,cwe,cisa_kev_detail, and its ownaffected_products— that nested one is a list of every product linked to the CVE, not just the product you subscribed to.created_at— when the alert was raised.ransomware_notified_at— timestamp of the ransomware notification for this alert, otherwisenull.
For ransomware-linked CVEs, the JSON payload carries an extra reason field set to ransomware_status_changed. The Adaptive Card format sends a dedicated ransomware card instead.
Testing
Section titled “Testing”Click Test Webhook to post the example payload shown on the page — in whichever format you selected — to your configured endpoint. This lets you verify the connection before real alerts start flowing. The endpoint must already be saved and enabled, otherwise the test returns an error instead of sending anything. The sample is a fixed canned document, not a real alert, and its keys differ slightly from a live delivery: it uses unread and timestamp where a real alert sends is_read and created_at.
Delivery Reliability
Section titled “Delivery Reliability”- Failed deliveries are retried up to 5 times with 60-second delays between attempts.
- Every attempt is recorded server-side with the payload sent, a success flag, and a timestamp — plus the response status code and body when your endpoint answered, or the connection error when it did not. These records are not exposed in the project UI or the API, so for day-to-day debugging rely on your own endpoint’s logs and the Test Webhook button.