
Your First Project
Everything in CVEFeed.io is organized around projects. A project is an isolated workspace where you track the software products your organization uses, receive vulnerability alerts, manage integrations, and collaborate with your team. Think of a project as a security monitoring scope — you might create one per product team, per client, or per environment.
Each project has its own subscriptions, alert rules, API tokens, and member list. This isolation means different teams can work independently without interfering with each other.
Create a Project
Section titled “Create a Project”When you sign up, CVEFeed.io automatically creates a default project for you — named after your account name (e.g., “John’s Project”). This means you can start adding products and receiving alerts right away without any setup.
Open the project switcher at the top of the sidebar and click Manage Projects to reach the My Projects page. Your default project is listed there, next to a card that tracks your project quota: while your plan still has room the card is a Create New Project form, and once the quota is used up it becomes a locked Project Limit Reached card whose only action is Upgrade Subscription.
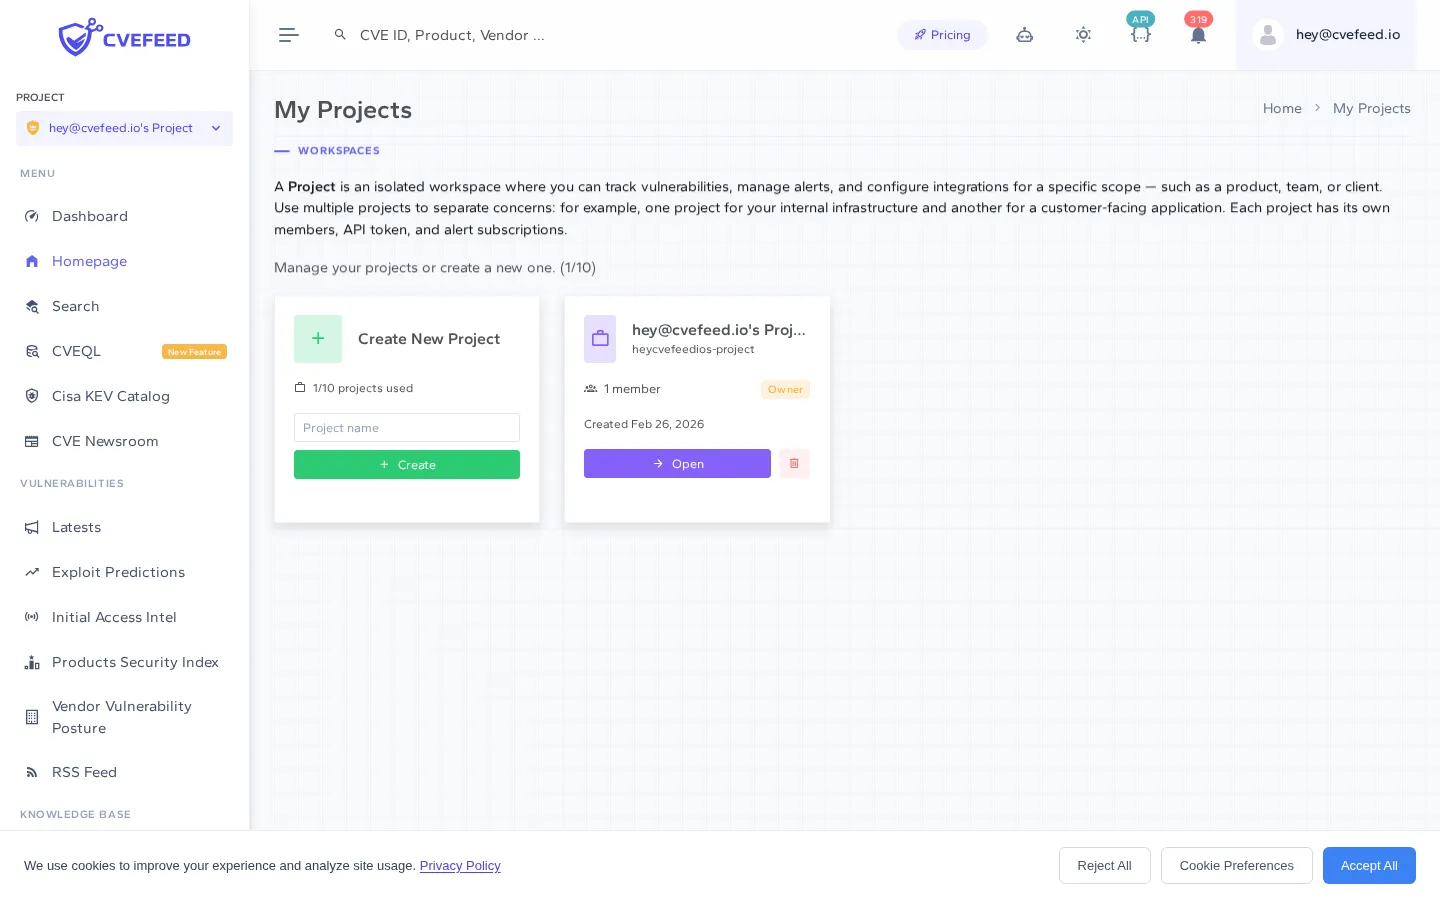
From here you have two options:
- Start using your default project — click into it and begin subscribing to software products immediately. If you only want a different name, open the project dashboard and click the pencil button beside Owner in the Project & Team card (project owner only) — it opens a Rename Project dialog. Renaming changes the name only, so your subscriptions, API tokens, members and the project’s URL all stay as they are.
- Create another project — to keep separate scopes apart, add a second project. How many projects you can own depends on the plan: Free 1, Starter 3, Pro 5, Enterprise 10. On Free the default project already fills that single slot, so the create form is replaced by Project Limit Reached until you upgrade — and deleting the default first is not a way around it, because you cannot delete your last remaining project.
To create a project, once the Create New Project card is available:
- Enter a name in the Project name field — up to 25 characters, and something descriptive like “Production Infrastructure” or “Client Portal”.
- Click Create.
That’s it. Your project is created instantly and you’ll be taken to its dashboard.
Project Dashboard
Section titled “Project Dashboard”The project dashboard gives you a high-level view of your security posture within this project. It shows your subscribed vendor and product counts, recent vulnerabilities affecting your stack, known exploited vulnerabilities (from CISA KEV), and your team members.
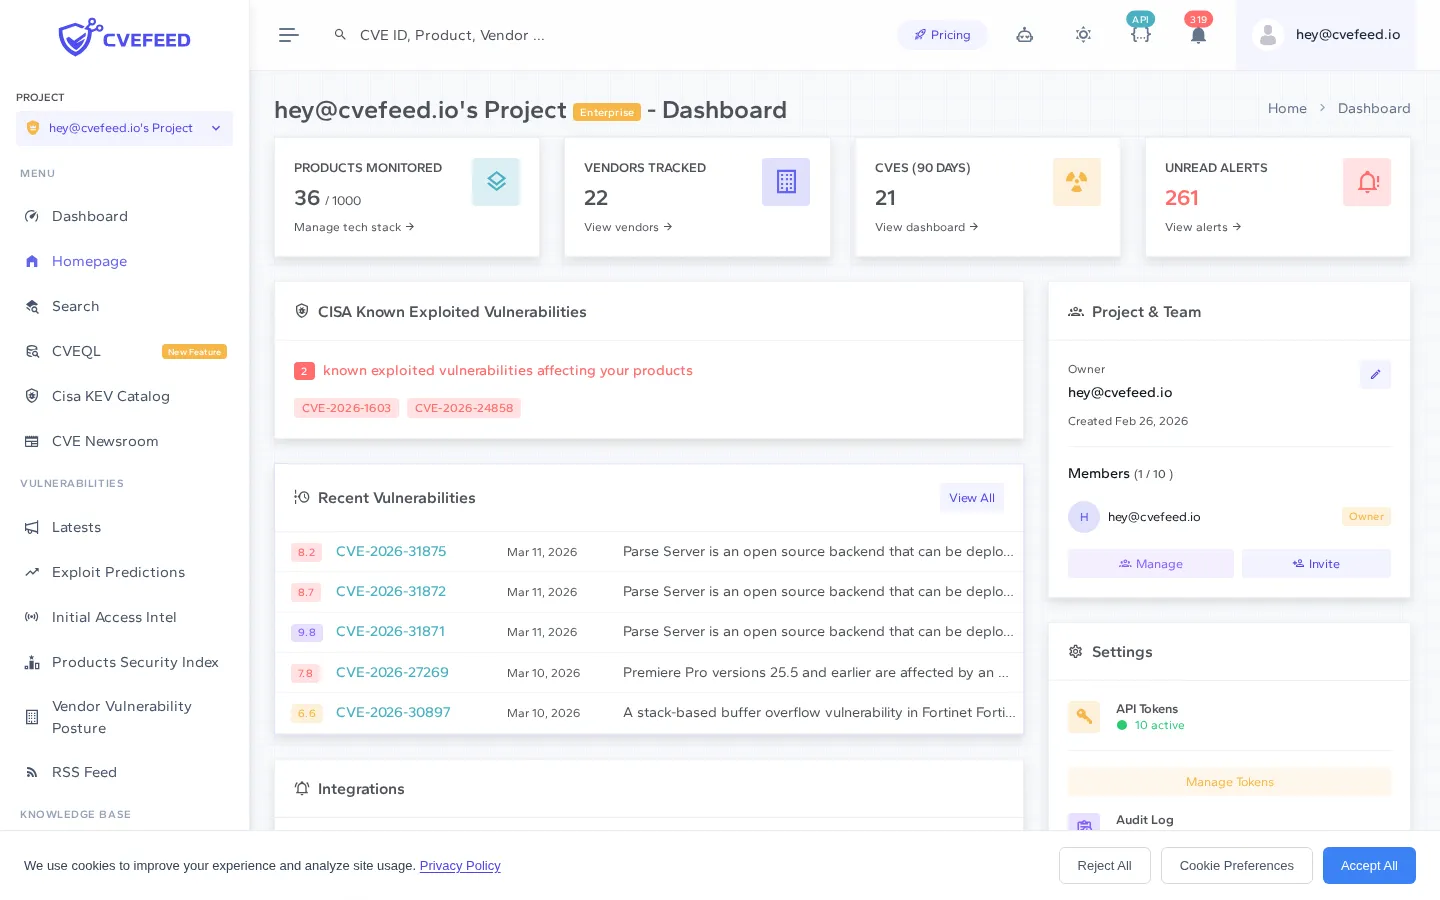
The sidebar on the left is the same in every project: it links to the platform-wide pages — Dashboard, Search, CVEQL, CISA KEV Catalog, CVE Newsroom and the rest. Its only project-aware element is the project switcher at the top, which shows your active project and role, lets you switch between the projects you belong to, and links to Manage Projects. Your project’s own pages — Project Dashboard, Tech Stack Management and the tech stack Dashboard — are reached from the user menu in the top-right corner, or from the links on the project dashboard itself.
Subscribe to Software Products
Section titled “Subscribe to Software Products”The core of CVEFeed.io is product subscriptions. When you subscribe to a software product, CVEFeed.io automatically monitors for new CVEs that affect it and sends you alerts through your configured channels.
Open Tech Stack Management from the user menu in the top-right corner, or follow the Manage tech stack link on the project dashboard’s Products Monitored card.
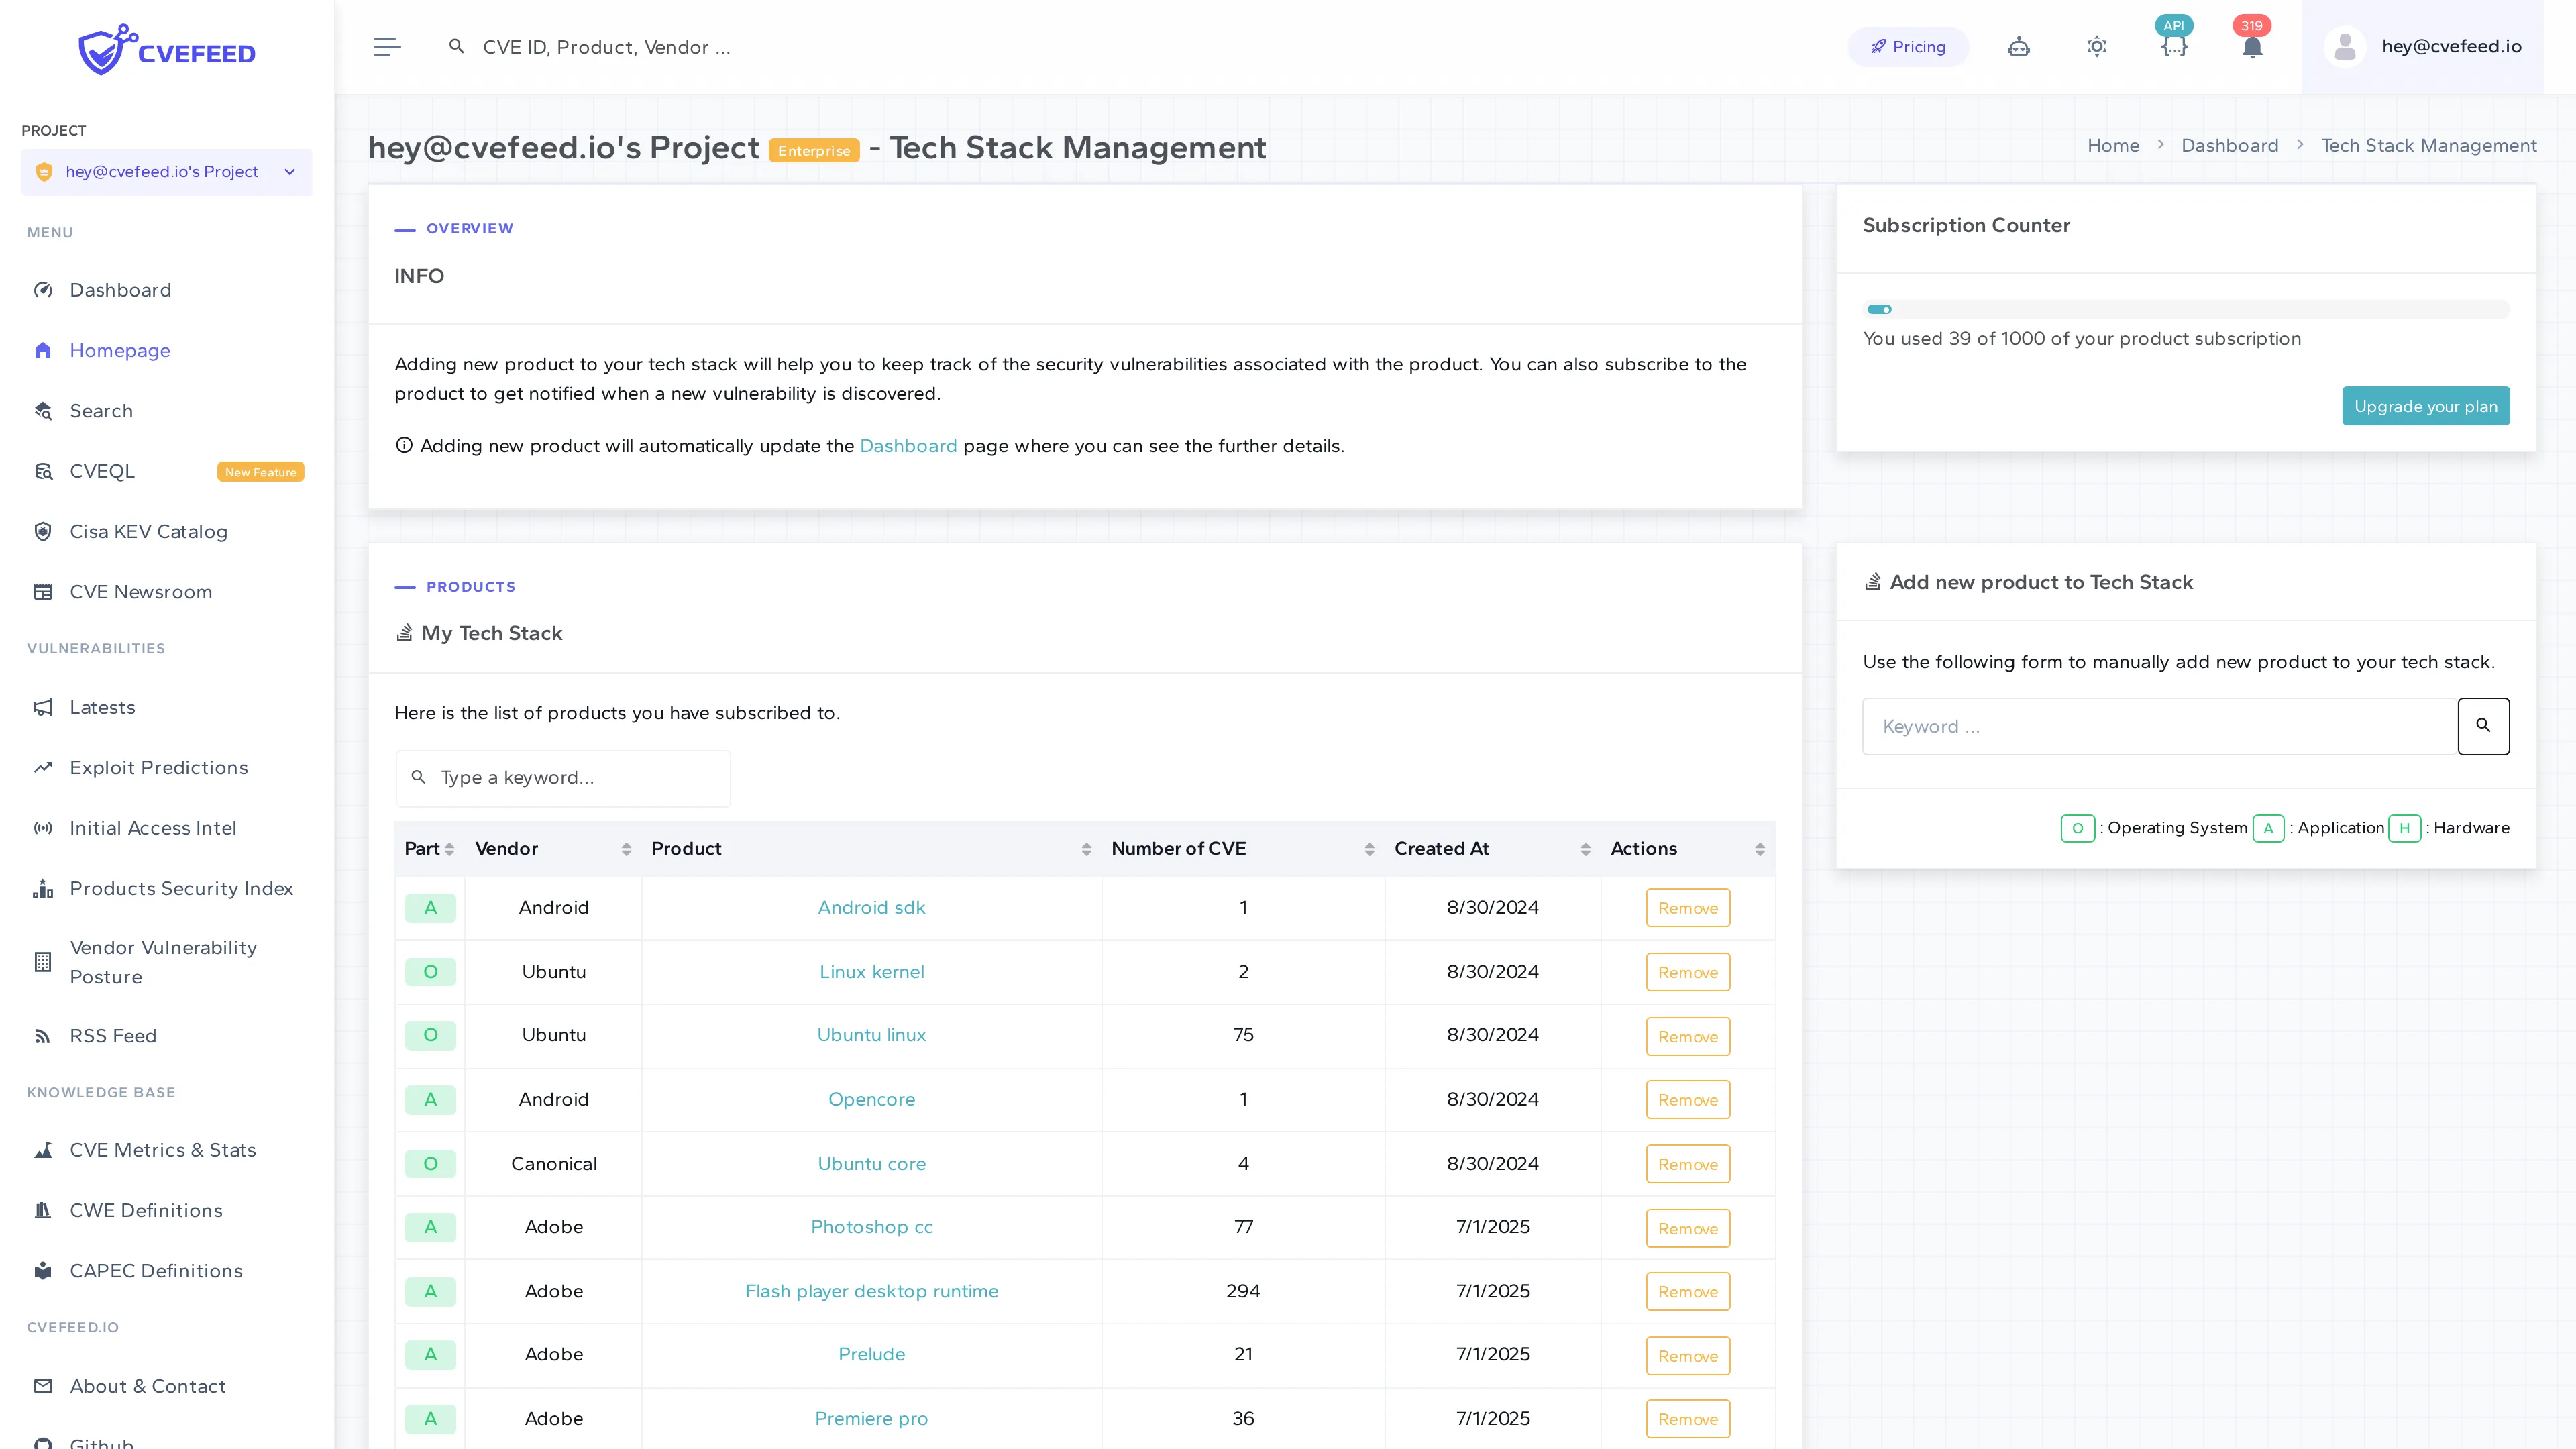
To subscribe to a product:
- Use the Add new product to Tech Stack form on the right side of the page.
- Type at least three characters in the Keyword … box and press Enter (or click the magnifier). The search matches vendor name and product name together against the CPE dictionary, so “apache”, “http_server” or “apache http_server” all reach Apache’s
http_server— naming both narrows the list fastest. Closest matches are listed first. - Pick the right row from the results. Each row shows the product name, its vendor, and how many CVEs are on record for it — which is how you tell apart two entries that otherwise look identical.
- Click Add on that row. The button switches to Added; a product this project is already subscribed to shows Remove instead.
The product appears in your My Tech Stack table the next time the page loads. From now on, any new CVE published against that product will trigger an alert.
Subscription Limits
Section titled “Subscription Limits”The number of products you can subscribe to depends on the project owner’s subscription tier. On the Free plan you get 10 subscriptions — enough to get started and see the value before upgrading. See Subscription Limits for a detailed breakdown of how limits work across projects.
What Happens Next
Section titled “What Happens Next”Once you’ve subscribed to products, CVEFeed.io works in the background:
- New CVEs that match your subscribed products generate alerts.
- Email notifications are sent to project members by default.
- If you’ve configured Slack, webhooks, Microsoft Teams, or Jira integrations, alerts are delivered there too.
- Your project dashboard updates with the latest vulnerability counts and details.
Next Steps
Section titled “Next Steps”- Invite your team so everyone stays informed about new vulnerabilities.
- Configure alert channels to choose how notifications are delivered.
- Create an API token to integrate CVEFeed.io into your existing security toolchain.